Knobology
Knobology is the science and art of using the different knobs available on an ultrasound machine, to acquire and optimise images for proper diagnosis. It is the first expertise younger colleagues should master under training. There is no doubt in my mind, this is the most important section in this book. It dictates how we get the best out of ultrasound machines, to fulfil the purpose they have been manufactured for.
There is a common saying that a machine is as good as
the person behind it. Having said that, some ultrasound machines are more
advanced than others. Simple machines may be adequate for utility functions in the wards or labour rooms, while more advanced machines are necessary for more advanced diagnostic jobs.
Ultrasonography
is usually used to help in establishing a proper diagnosis, taking into account the
clinical data provided. In other words, it is used to extend the clinical judgment
for better management of the concerned patient. Accordingly, image acquisition
and optimization are most important in this respect. Many experienced
ultrasonographers have established through time and experience their own routines, to fulfil these two
requisites. However, for all concerned, knowledge and dexterity in using the different ultrasound knobs remain to be the most important technical assets. These knobs are used for powering on and off the machine, controlling total gain, adjusting time
gain compensation, dynamic range and depth, read and write zoom, freezing and saving
the images, carrying calculations and finally printing. Few of these terms have been
alluded to in the previous chapter, Facts and Rules. Using Doppler knobs is beyond this basic Knobology chapter, and will be addressed separately in a different section.
Depth
When acquiring an image, start with
higher depth, and decrease it to put the area of interest at ¾ of the screen. The remaining ¼ is important as it may help with the diagnosis in cases of
distant shadowing or enhancement. These two findings may be important, to help with the diagnosis. Distant enhancement is characteristic of simple cysts, at the distant fluid / tissue interface. On the other hand, shadowing usually indicates distant attenuation of the ultrasound beam, as seen during scanning fibroids, or cystic areas with solid components. Furthermore, occupying the whole image with the uterus, for example may miss, important pathology behind it.
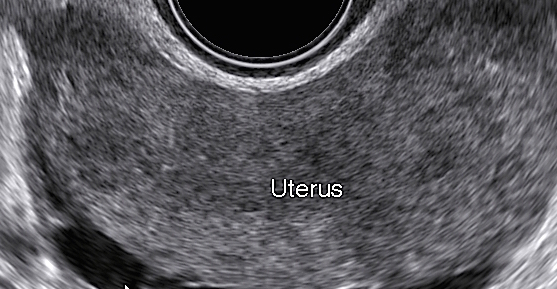
- The first image below shows the whole area occupied by a uterus.
- The second image, on the other hand, shows the same uterus with encysted pockets of fluid behind it, which were concealed almost totally in the first image. This infertile patient had pelvic inflammatory disease with pelvic adhesions.
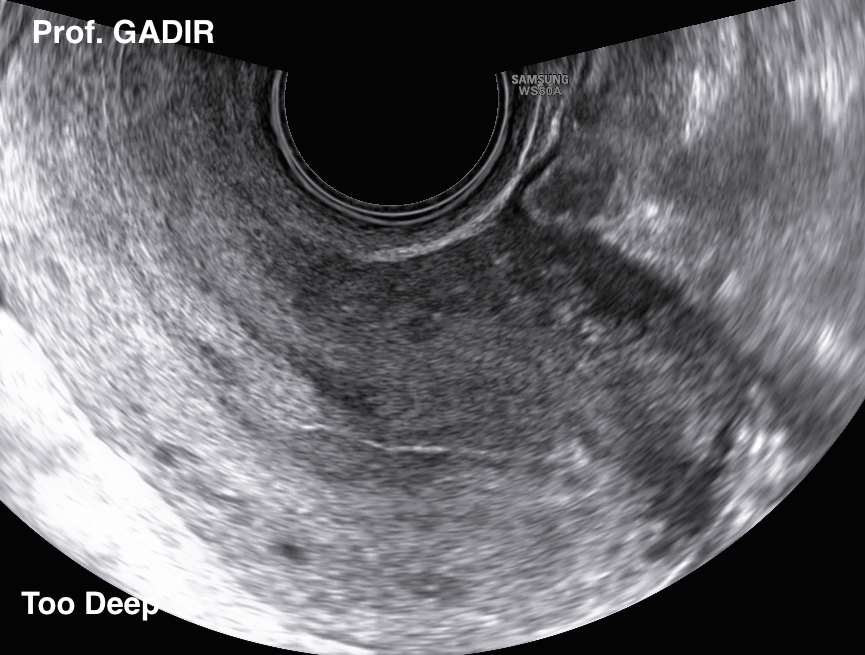
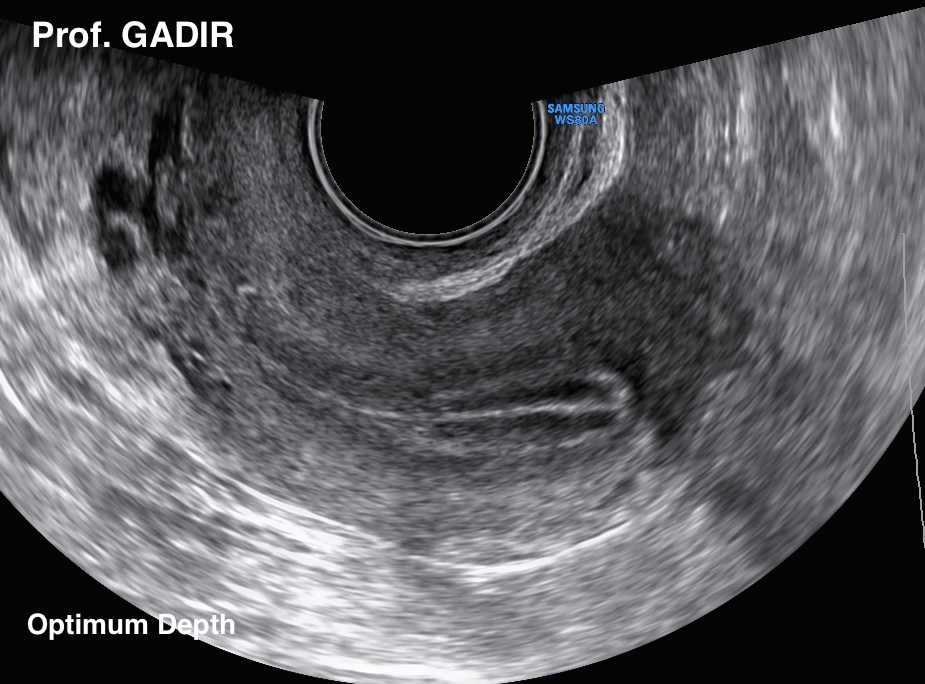
The following three images below also demonstrate the importance of using the right depth. The first image is too small, with half the screen unused below the image. This sort of size may lead to failure to visualise some important details in the image itself. The second image is too large, with no space beyond the uterus. This may also lead to failure of visualisation of some important findings distant to the uterus in this case. The third image is of optimum size, and occupies 3/4 of the screen depth.
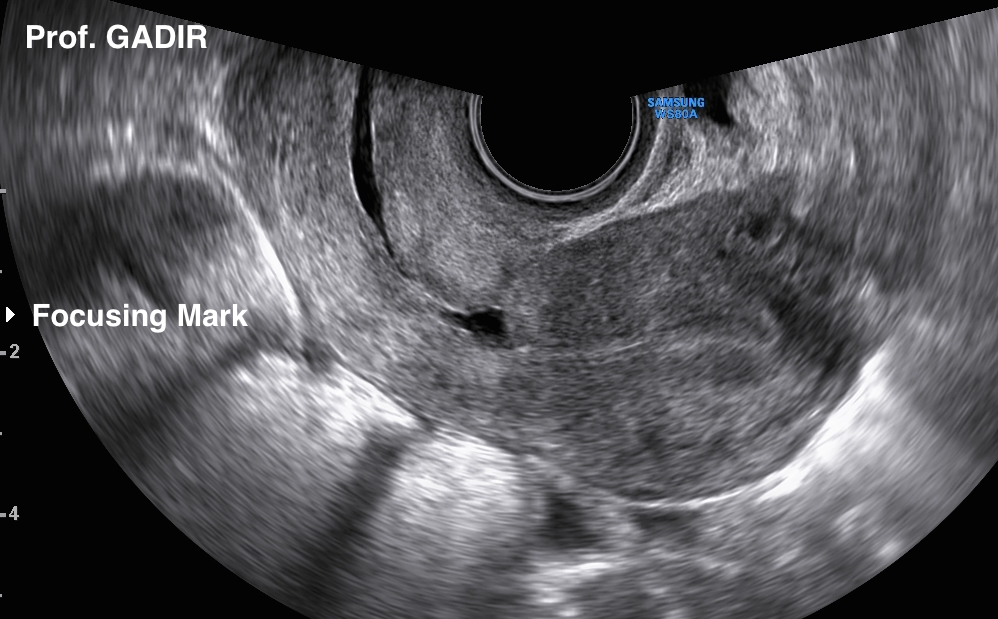
Focusing
The next step is to focus the ultrasound beam to the
level of most interest in the image. Using one focal zone gives the best result for axial resolution. On the other hand, increasing the number of focal zones gives
better lateral resolution, at the expense of having a slower frame rate.
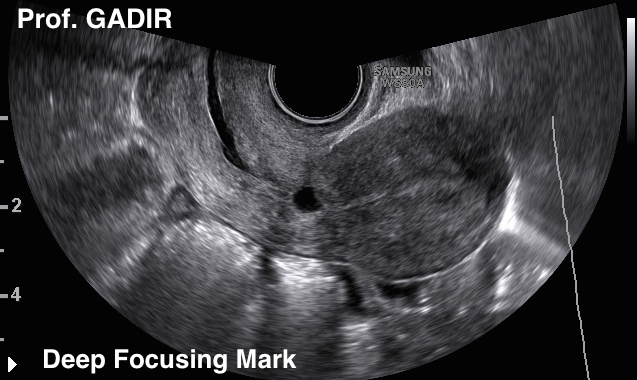
- The first image below shows wrong focussing of the ultrasound beam, as shown by deeper positioning of the focus sign, away from caesarean section niche, which was the area of interest.
- The second image shows proper ultrasound focusing, as shown by the location of the focusing mark at the level of most interest.
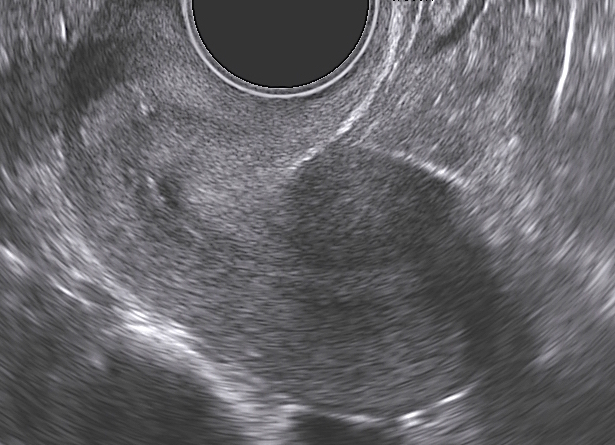
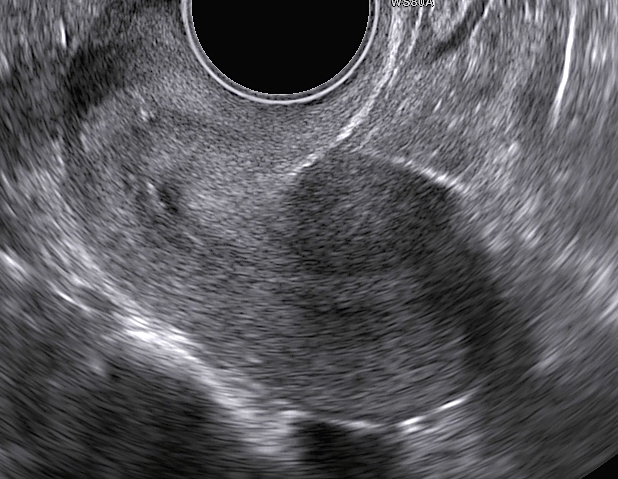
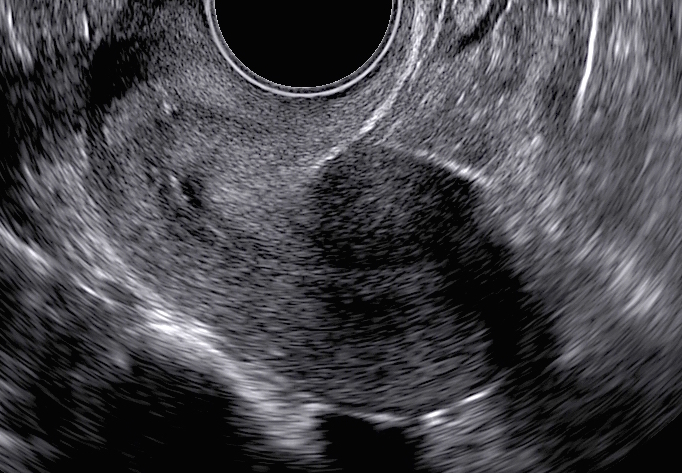
Dynamic
Range
Dynamic range, reflects the number of gray shades in an image, hence echo intensity in shades of gray. It is the ratio of the brightest part of the image to the darkest. When properly set, it helps with producing an overall smoother image, which in turn helps with better tissue identification. In other words it controls how white or black images can be, or adjustment of image contrast.
A wide range will display more shades of gray and overall smoother image, with low contrast. A narrow range, on the other hand, will display fewer shades of gray and higher contrast. That is to say, reducing the dynamic range, removes the low-level echoes, hence increasing the contrast.
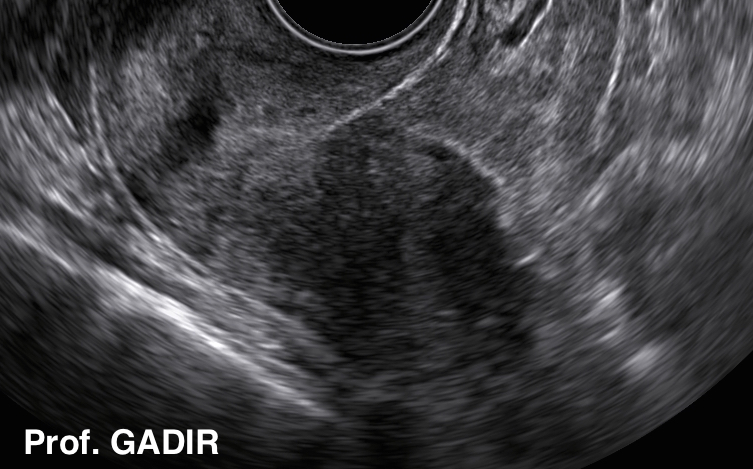
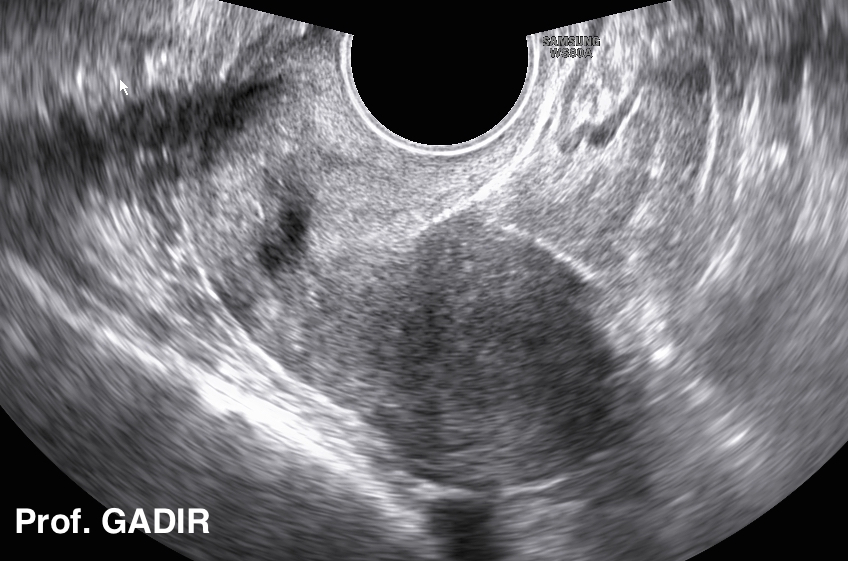
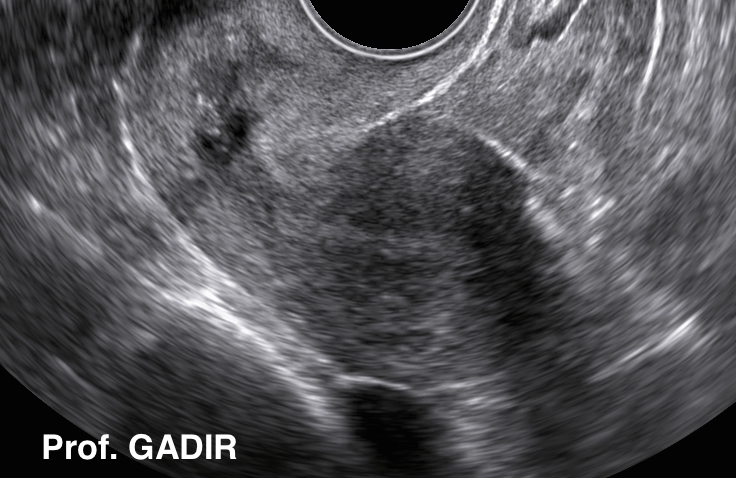
The three ultrasound images below show the effect of different contrast settings on image quality of the same uterus. It is important to remember that proper setting of the dynamic range depends on the type and echogenicity of the tissue being examined. There is no single figure or value, which is appropriate for all tissues. Also personal preference how grainy an image may be, plays a role in setting the dynamic range.
Overall Gain
As mentioned in the previous chapter, the gain knob controls the brightness in the whole image. Accordingly, it must be optimised to obtain better
image details. It is a tendency for beginners to use very high gain, which may increase noise, and reduces the fine details in an image. Always use the overall gain in conjunction with Time Gain Compensation to get better images in the near, middle and far fields. Also maximise the gain first in difficult cases, before increasing the power. It must be said that how bright or dim an image is, tends to be a personal preference issue, and what is optimum for one examiner may not be suitable for another.
The 3 images above show how setting the total gain can affect tissue details. The gain was very low in the first image. It was high in the second image.The third image shows optimum image gain, with the thin post menstrual endometrium seen only in this image.
Time Gain Compensation [TGC]
As mentioned before, time gain compensation varies the gain intensity in certain depths of the image. It compensates for attenuation of brightness in certain parts of the image, secondary to ultrasound beam absorption, reflection or refraction as it passed through the tissue. One can use TGC to obtain a smooth gray-scale image. This should be done by sliding the TGC knobs gradually, otherwise great differences between adjacent knobs may cause stripes in the image. Time gain compensation has different other names including
STC: spatial time compensation
DGC: distance gain compensation
Few new machines offer facilities for optimisation of contrast and brightness of 2D images, by adjusting gain and TGC automatically. This facility should be used liberally during routine work.
Zoom
The zoom knob can be used to magnify the
area of interest in the image. 'Write Zoom' increases the size of the selected area, and improves the image quality at the same time. On the
other hand, 'Read Zoom' only magnifies images, including any artefacts available. It is usually advisable to go from wider views to zoom in. Zooming in may be particularly useful when exact documentation is required, such as for nuchal translucency measurement. It is also useful when very fine details, within an image, need to be verified.